M
mario53
- #1


Samsung Galaxy S8 /S8+ G950F/FD & G955F/FD

S'il vous plaît,
Connexion
ou
S'inscrire
pour voir le contenu ou les urls !

Cette opération comporte des risques. Ni moi ni Phonandroid ne peuvent être tenu responsables des éventuels problèmes rencontrés. Pensez à effectuer une sauvegarde de votre système et EFS avant toutes modifications ou flash !
Merci à
S'il vous plaît,
Connexion
ou
S'inscrire
pour voir le contenu ou les urls !

alexega © PROJECT
New base! Installation = 3minutes!
Made with a soul!
Very fast and literate!
Android 8.0 Oreo Odex
Models: S8 + G955F / FD and S8 G950F / FD
Base G955 | G950FXXU2CRF7
Multi-CSC G955 | G950FOXM2CRF7
Kernels of stock
Fix OEM!
Magisk v16.0
MagiskManager v5.7.0
The firmware is cleaned from the applications,
which can be installed from the market
Removed Knox and updates
All known hidden opportunities of Samsunga
Tweaks build.prop and cscfeature
Added camera modes
Video recording in the shutter
An additional icon in the power menu is activated
Lock application
Double tap on the status bar - Screen lock
In the panel of recent added Ram bar
Activated Mode Outdoor
Disabling of system applications in settings - applications
Full date in the blind
Full date on the lock screen
Full AOD dates
Disable the dialog for safe volume
Disable the dialog about high brightness in the curtain and in the settings
Multi-user mode is activated
Additional icons added to the curtain
Network traffic in the blind
Accelerated reboot speed
Weather: full dates, text removed.
Clock in the center in the status bar (hidden on the lock screen)
Internet speed on the left in the status bar
Up to 7 icons in the dock Tachwiza (by default it was up to 5)
Full Photo caller (The newest SamsungInCallUI.apk)
Name, number, location in 3D
Name of the subscriber in 2 lines
The keyboard has white letters for good visibility
Cosmetic text under the icons and removed some
Region number locator
Call recording
There are 7 visible togles in the curtain (the default was 6)
When you first set up, forced installation of software from Google
Added browser Samsung (latest version)
If you want, you can turn off the application settings!
State Official
The Volume bar activates the Signal Volume
Live messages
Saving messages
Floating Messages
Additional animation steps in the developer menu for all regions
Most applications have been updated!
Can that and still did useful
General cosmetics and optimization!
Mod for TWRP:
1. Screenshots in the format .png (were in .jpg)
2. Network signal on the left in the status bar and on the lock screen
3. wifi in left in the status bar and on the lock screen and to the right of the network (for beauty)
S'il vous plaît,
Connexion
ou
S'inscrire
pour voir le contenu ou les urls !

. Avoir activé OEM Unlock--> voir sujet ici et lire >> <<<
. Etre root ( pour backup efs ) et avoir installé le recovery TWRP de votre modéle
. Avoir sauvegardé votre dossier EFS --> (voir tutoriel).
. Avoir une batterie chargée (mini 75%)
. Etre root ( pour backup efs ) et avoir installé le recovery TWRP de votre modéle
. Avoir sauvegardé votre dossier EFS --> (voir tutoriel).
. Avoir une batterie chargée (mini 75%)

S'il vous plaît,
Connexion
ou
S'inscrire
pour voir le contenu ou les urls !

1- Copier/coller le fichier zip désiré que vous avez téléchargé dans la mémoire interne de votre téléphone.
2- Téléphone éteint, redémarrer en mode recovery ( volume haut + home + power )
3- Dans le menu qui s'affiche, sélectionnez "Backup" puis choisissez les partitions que vous voulez sauvegarder. Puis Faites glisser votre doigt de la gauche vers la droite sur "Swipe to Back Up" pour commencer la sauvegarde
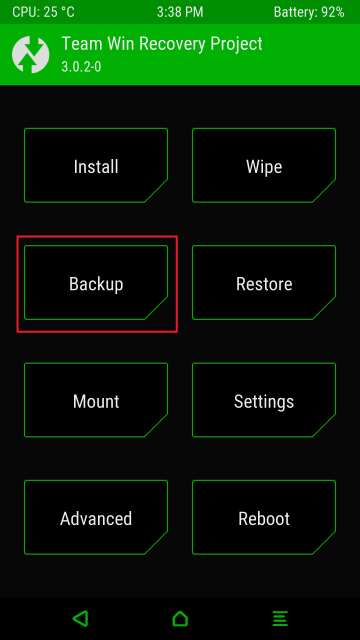
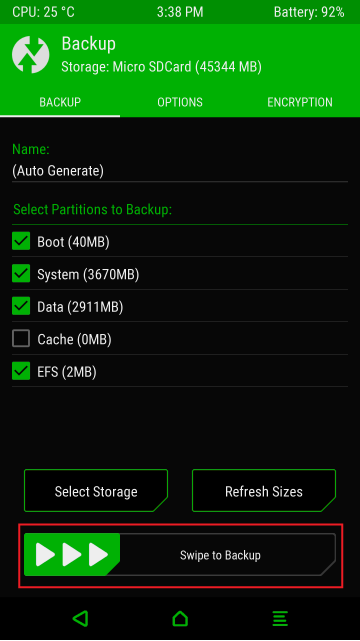
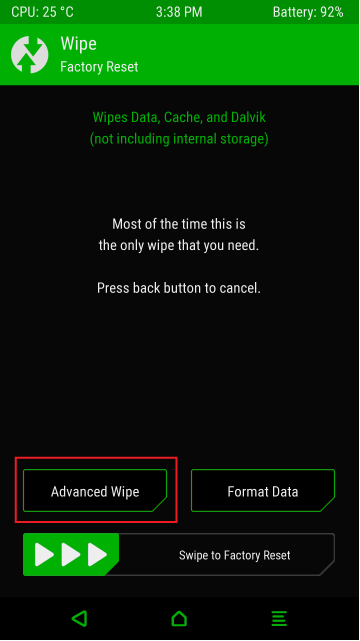
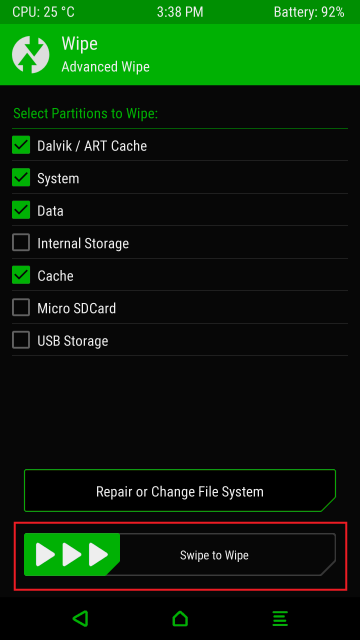
4- Une fois la sauvegarde effectuée, faites retour et allez sur " Wipe / Advanced Wipe" puis séléctionner " Wipe Cache +
Wipe dalvik/ART cache + Wipe Data + Wipe System et faites glisser votre doigt de la gauche vers la droite sur "Swipe to wipe"
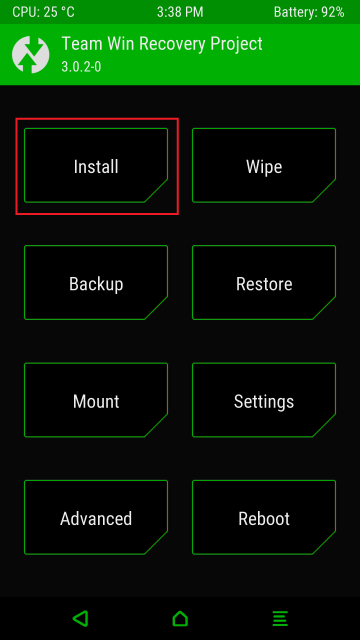
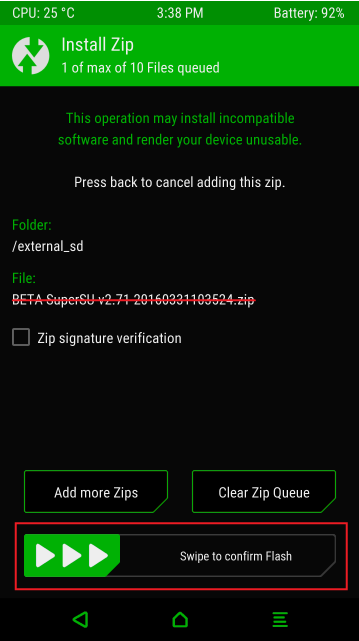
5- Revenez sur le menu principal, puis appuyez cette fois sur "Install". Là, il ne vous reste plus qu'à choisir le fichier de la rom puis le flasher en faisant glisser de la gauche vers la droite le "Swipe to Confirm Flash" !
6- Une fois le flash terminé, faite un wipe Cache puis "Reboot System Now"
Vos retours sont les bienvenus !
